The PATH to /home/timmy/grannys_house (Revisited)
Posted: 29 January 2012 Filed under: Linux | Tags: absolute path, BASH, command line, path, relative path 2 CommentsBack in the old days, when Timmy wanted to visit granny’s house, all he had to do was have Lassie lead him there. In today’s more complicated computer world, it takes a bit more understanding.
We’re going to learn a bit about a very important subject in Linux. It’s called PATH. The path to a file or whatever on your Linux operating system is something that you need to understand when manipulating files from the command line. Another term we’ll look at briefly is the working directory.
When Timmy, as a regular user, opens his terminal from his GUI or from the post login command line (Run Level 3 – multi-user, no X running), his working directory is in /home/timmy. Whichever directory you are in at the time is known as the working  directory. Timmy may navigate to another directory using the cd command. Let’s say he navigates to /usr/bin. At that time, his working directory becomes /usr/bin. See how this works?
Think of the Linux file system as a multi-room house. If you’re in bedroom4 right now, your working directory would be /house/bedroom4. If you walked out of that room and down the hall to bathroom02, then your working directory becomes /house/bathroom02. At that time, you may then use the command micturate. Heh! A little bathroom humor there.
OK, so now we know all about the working directory, right? Moving on…
Let’s say that Timmy wants to copy a .jpg that is in /usr/share/wallpaper over to the /home/timmy/grannys_house directory. He would open his terminal, which would then be sitting there with that blinking cursor waiting for Timmy’s next command:
timmy@lassies_machine~:$ |
Timmy’s working directory at this point is /home/timmy, as designated by the command line shorthand character ~ . If Timmy wants to copy the .jpg without actually going to the directory that it’s in to copy it, he must provide the proper path in his command.
timmy@lassies_machine~:$ cp /usr/share/wallpaper/cabin.jpg /home/timmy/grannys_house
The above command, using absolute path names, directs the shell (command line interpreter) to copy the cabin.jpg image from the /usr/share/wallpaper directory to the /home/timmy/grannys_house directory. If Timmy wanted to just make a duplicate of a file in his /home/timmy directory, then he could leave off the / character when showing the command line the proper path. This can be done because he’s already in the /home/timmy directory. It is his working directory. He can now use a relative path to direct the shell to make the copy.
timmy@lassies_machine~:$ cp cabin.jpg cabin.jpg_backup
In the above example, notice that there is no / being used. Timmy is simply making a backup copy of cabin.jpg. Both files are relative to his working directory, so the shell understands that Timmy just wants to make this duplicate right there in that same directory.
It’s really not rocket science, to use that worn out old cliché. The command line can be pretty simple once you get the hang of it folks. You know what I always say… Don’t fear the command line. I hope you’ve learned something here today. Remember to click the links within the article. You’ll find some more useful information and a few definitions for you there.
Later…
~Eric
Further reading:
Paul Sheer’s Rute Users Tutorial and Exposition
Image credits: Timmy (Jon Provost) and Lassie image owned and copyright by Classic Media
Note: This article originally appeared on my old Nocturnal Slacker/Lockergnome Blog (now defunct).
Sometimes, You Just Have to Revert
Posted: 19 July 2011 Filed under: Other Distributions | Tags: Arch Linux, broken extensions, command line, pacman, revert, Thunderbird 4 CommentsFor a couple weeks now, I’ve been having issues with Thunderbird 5 in my Arch Linux installation.
I have a few much-used extensions installed in my Thunderbird, and 5.x broke four of them when it updated in Arch from 3.1.11. I tried a few work-arounds. I tried to live without the extensions. This morning I decided that I just wasn’t going to deal with this any longer. I reverted. How’d I do that, you might be asking? Well, with Arch (in most instances), it’s pretty simple.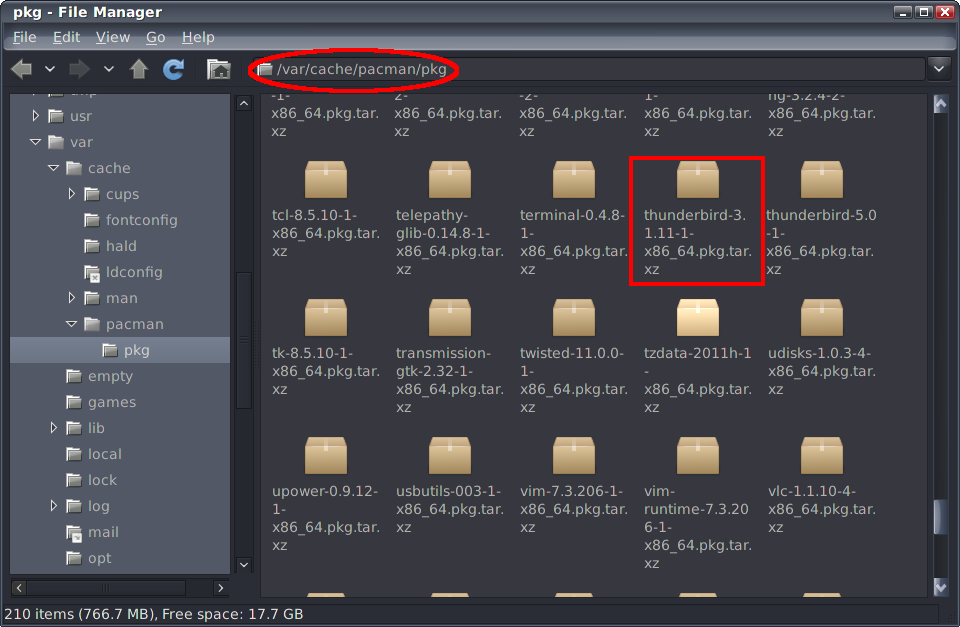
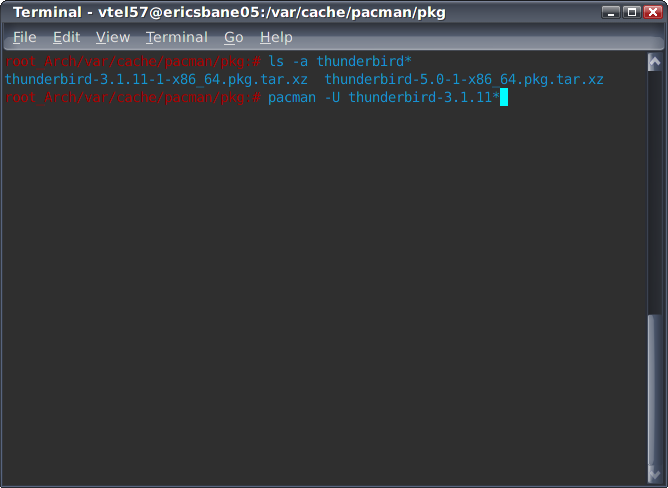
First item of importance is that I had a backup of my Thunderbird 3.1.11 .thunderbird directory backed up on separate media (DVD). Second item is that I had not run pacman -Scc in a while. This command clears the cache of installed items in Arch. So, with those items being satisfied, I was able to revert using the magical pacman -U command.
#pacman -U thunderbird-3.1.11*
The asterisk denotes auto-completion at the command line. BASH will automatically add the remaining characters to the command.
And with that simple series of commands, my world is back to being wonderful once again. Oh, and to make sure that I don’t accidentally upgrade T-bird on my next pacman update session, I’ve added it to the ignore list in my pacman.conf file.
#vim /etc/pacman.conf
# Pacman won’t upgrade packages listed in IgnorePkg and members of IgnoreGroup
IgnorePkg = thunderbird
There you have it. The wonderful simplicity of Arch package management.
Have fun… and learn something while you’re at it. 🙂
~Eric
The GNU/Linux Adventurer’s Backpack
Posted: 26 April 2011 Filed under: Linux | Tags: Bruno, Bruno of Amsterdam, BrunoLinux, command line, distributions, GNU, GNU/Linux, Linus Torvalds, Linux, man pages, Mepis, Mint, Patrick Volkerding, PCLinuxOS, Richard Stallman, Slackware, Ubuntu, Ultimate Edition 23 CommentsIf you are setting off on your new GNU/Linux adventure, there are some must have things that you’ll be needing to take along with you.
When you’re at the kitchen table packing that backpack for your big adventure, don’t forget to stuff these items in there with your lantern, matches, water purification pills, and lip balm. You’ll find this stuff will come in very handy along the trail.
A little history —
Linux, which specifically means the kernel portion of the operating system, was born in 1991 when Finnish student Linus Torvalds decided he wanted something to run on his 80386 processor based PC. Linus turned the code for his new kernel loose on USENET.
Within a short while Softlanding Linux System (SLS) was born of a mating of Linus’ new kernel and Richard Stallman‘s GNU Operating System. The SLS project was taken over by Patrick Volkerding, who morphed it into Slackware Linux, the oldest still living GNU/Linux distribution. You can view the Linux family tree to see how things progressed from there.
Some handy documentation —
C’mon. Quit whining. Sometimes, it’s a good thing to read the fine manual. The “man” pages, short for manual, are available to you from within any GNU/Linux distribution. They’re already in your backpack even if you didn’t know it. To access a manual page for a certain command within Linux, just use this from the command line:
$ man <command or application name>
For example, let’s say you want to know how to use the ls command. You would type this into the command line:
$ man ls
LS(1) User Commands LS(1)
NAME
ls – list directory contents
SYNOPSIS
ls [OPTION]… [FILE]…
DESCRIPTION
List information about the FILEs (the current directory by default).
Sort entries alphabetically if none of -cftuvSUX nor –sort.
Mandatory arguments to long options are mandatory for short options
too.
-a, –all
do not ignore entries starting with .<snip>
…and the manual page for the ls command will magically appear. Cool, huh? You can also refer to that same manual page by using online websites that make that same information available to you. You can use Linux Man Pages, Linux Man Pages Online, or other similar sites.
For some more in depth GNU/Linux documentation, you can check out The Linux Documentation Project (TLDP), LinuxDocs.org, or DistroWatch.com. The last provides brief synopses and reviews of most of the GNU/Linux distributions available today.
Which distribution to start the adventure? —
If you clicked on that DistroWatch link above, you’d see that there are many, many GNU/Linux distributions out there in the world. While choice is a good thing, numerous choices can sometimes be overwhelming for new adventurers; what trail should I take? Every GNU/Linux advocate will have their own favorite list of distributions that they recommend to all the new adventurers they run across. Following is my list of the five easiest transition distributions. What’s a transition distribution? I define that as a GNU/Linux distribution that is easy to install and use right out of the box for new adventurers who are mostly used to using Microsoft Windows products.
Ubuntu – this is the distro that took GNU/Linux from the desktops of geeks like me and put it on Gramps and Granny’s system. It did more to popularize the GNU/Linux operating system than any other distribution prior.
Linux Mint – this distro from the land of Eire is slam packed with all the great stuff you’d want in an operating system. It’s good to go right out of the box.
Mepis – while not the most popular GNU/Linux out there, this Debian-based distribution is a fine product, and most suitable for new adventurers.
PCLinuxOS – this distro is a branch of the old and venerable Mandrake/Mandriva GNU/Linux. It’s easy to install and to operate.
Ultimate Edition – this distribution gets its foundation from its Debian and Ubuntu roots. It is also easy to install and has loads and loads of useful software included the moment you boot up.
Vector Linux – this excellent distribution is based on Slackware Linux. It is easy to install and use.
OK, then. We have some history, some documentation, and a choice of distributions in our backpack now. We’re almost ready to begin the adventure. But wait! There are a few more very important items that we’ll be needing.
Tips and Tutorials —
Tutorials are documents that teach in a step-by-step fashion. They can cover a lot of information in a small space. They’re usually simplified so that amateurs and novices can follow along without the need to know the really complicated stuff underneath it all. Tips are just that; little tid-bits of information to make things go easier on your adventure.
There was once a man called Bruno, he was my friend. He was also a serious GNU/Linux advocate and teacher. He selflessly spent many hours of his daily life teaching others about GNU/Linux. Many of us who knew him learned from him and were inspired by him to carry on his tradition of teaching. While Bruno may no longer be with us, part of the legacy he left us is his Tips for Linux Explorers site. Yes, some of the info there is a bit dated, but most of it is still very relevant and helpful.
As far as tutorials go, there are many sites with wonderful GNU/Linux tutorials. Here are a few that I use regularly: The Linux Tutorial, YoLinux Tutorials, Linux Survival, HowtoForge, Tutorialized, and Linux Planet Tutorials. Believe me, if there’s something you want to accomplish within GNU/Linux, there is a tutorial somewhere that will show you how. Remember, when searching for answers to your GNU/Linux questions, Google is your friend.
More good reading —
5 Things Every Aspiring Linux User Should Know – another article that may be useful to new Linux Adventurers.
New to Linux? Here’s Your Hitchhiker’s Guide to Linux Forum Galaxy! – by Megatotoro
Some Advanced Reading —
The books listed below are somewhat advanced. I wouldn’t recommend that new Adventurers dive into them right off. Give yourself some time to climb a bit higher on that learning curve, then give these books below a peak or two. The more you experience GNU/Linux, the more the information in these books below will make sense to you. I put them here because they are excellent learning tools… when you reach that level.
Linux – Rute User’s Tutorial and Exposition by Paul Sheer
LINUX: Rute Users Tutorial and Exposition is the only Linux sysadmin’s guide proven by 50,000+ Web users. It presents in-depth coverage of all aspects of system administration: user management, security, networking, Internet services, packages, config files, shell scripting, and more. It also contains detailed cross-references to LPI and RHCE certification topics, making it invaluable for exam preparation. (description from Amazon.com) *This book is also available online in .pdf format.
Linux Pocket Guide by Danial J. Barrett
Linux Pocket Guide is organized the way you use Linux: by function, not just alphabetically. It’s not the ‘bible of Linux; it’s a practical and concise guide to the options and commands you need most. It starts with general concepts like files and directories, the shell, and X windows, and then presents detailed overviews of the most essential commands, with clear examples. You’ll learn each command’s purpose, usage, options, location on disk, and even the RPM package that installed it. (description from Amazon.com)
A Practical Guide to Linux – Commands, Editors, and Shell Programming by Mark G. Sobell
Packed with hundreds of high-quality, realistic examples, this book gives you Linux from the ground up: the clearest explanations and most useful knowledge about everything from filesystems to shells, editors to utilities, and programming tools to regular expressions. Sobell has also added an outstanding new primer on Perl, the most important programming tool for Linux admins seeking to automate complex, time-consuming tasks. (description from Amazon.com)
Understanding the Linux Kernel by Bovet & Cesati
Understanding the Linux Kernel will acquaint you with all the inner workings of Linux, but it’s more than just an academic exercise. You’ll learn what conditions bring out Linux’s best performance, and you’ll see how it meets the challenge of providing good system response during process scheduling, file access, and memory management in a wide variety of environments. This book will help you make the most of your Linux system. (description from Amazon.com)
The Debian System by Krafft
The Debian GNU/Linux operating system approaches Linux system administration differently than other popular Linux distributions, favoring text-based configuration mechanisms over graphical user interfaces (GUIs). Debian may appear simplistic and even slightly outdated, but it is actually very robust, scalable, and secure. Debian’s open development cycle and strict quality control by the developers help Debian to constantly gain popularity, despite its reputation as an operating system just for professionals and hardcore computer hobbyists. (description from Amazon.com)
And lastly, but never last, this most necessary thing to have in your GNU/Linux adventurer’s backpack:
Community —
We come into this world alone and we leave it alone, but fortunately, while in this world, we have each other. Were it not for the GNU/Linux – Open Source community, there wouldn’t be any GNU/Linux; or if there were, it would be some ghastly thing used by a few uber-geeks in the darkness of night on their own desktop systems. Joyfully, that isn’t so because we have community; arguably the most important ingredient in the brewing pot.
There is a large and very active GNU/Linux – Open Source community every where in the world. You can access and interact with that community in many ways; boards and forums, USENET Groups, mailing lists, websites and portals, blogs like this one, etc. Community means a lot to me. Below you’ll find my list of favorite places where I go to learn what I need to continue on my own adventure:
Boards and Forums
Scot’s Newsletter Forums – Bruno’s All Things Linux – a Linux support forum and much more. This site is run by Scot Finnie, Editor-in-chief of ComputerWorld.com.
Jeremy’s LinuxQuestions.org – a Linux support forum and community dedicated to assisting adventurers of all skill levels and abilities.
TechSupportGuy Forums – Linux and Unix – another excellent Linux community forum.
The Linux Foundation’s Linux.com Community – a relatively new and growing community with many helpful members.
Just Linux Forums – a great community resource.
Linux Forums – search this place for great tips and assistance as you travel along in your adventure.
Also, don’t forget… nearly every distribution of GNU/Linux has its own very helpful support community. Check out the main websites for links to their forums and such. All the distros mentioned above have their own forums. Check ’em out.
Linux News Sites
Tux Machines – Susan Linton’s wonderful Linux community site.
Linux Today – news you can use.
Linux Insider – more informative Linux news.
LXer Linux News – the world is talking about GNU/Linux and Free/Open Source Software.
The above are just a sampling. There are literally hundreds of top level, informative Linux news sites on the Net. Search!
Linux Learning Blogs
Linux Operating System – Guillermo Garron’s very helpful and informative blog.
Linuxaria – Ricardo Capecchi’s bi-lingual Everything About Linux blog.
All About Linux – a self-professed “very” popular blog about Linux, Open Source, and Free Software.
Linux Notes from Dark Duck – helpful information on choosing and running Linux on your systems.
Dedoimedo – a place to learn a lot about a lot. A unique experience, I might add.
There are many more sites out there, too. Each distribution usually has a handful of dedicated bloggers and teachers running from their own websites. Don’t forget to search online. You’ll find some wonderful stuff.
One other thing you can do when starting out on your adventure is to register with The Linux Counter and be counted as part of the community. Proudly display your Linux Registered User number for all to see. Sorry, they’re out of stock on the super-dooper decoder rings, though. You may find one in that Cap’n Crunch serial box on your kitchen table. 😉
I’ve tried to make this as all-inclusive as I could, but of course, I’ve failed miserably. GNU/Linux is a topic that volumes have been written about. How could I possibly give you all that information in one short article? Oh well. I hope that what you do find here will help you along in your adventure. I leave you with three bits of wisdom that I learned early on when I first started out on my adventure:
- First and foremost, GNU/Linux is NOT MS Windows. Please don’t expect it to be.
- Secondly, KEEP notes! You will find this an immeasurably important practice to discipline yourself into doing regularly. I don’t care if your notes are on your iPad or your main system or on a dead tree note book (my choice medium). Just keep notes. You won’t regret it.
- Lastly, but again NEVER last, the community is there for you. Take from it all that is offered, so that you can learn and expand your horizons on your great GNU/Linux adventure. We ask only one thing from you in return; when the time comes that you have reached a level of knowledge where you can comfortably (and accurately) do so, please give back to the community that supported you. This way there will always be those willing to help the new GNU/Linux Adventurers coming along the trail.
Happy adventuring!
~Eric
P.S. I intend this document to be a living device. I will probably be amending it from time to time.
Addenda:
I – 08 May 2011
a. added Vector Linux to suggested starting distributions
b. added an advanced book list for those who would like to go a bit deeper in their studies
II – 28 February 2012
a. added link to 5 Things Every Aspiring Linux User Should Know
III – 22 August 2012
a. added Megatotoro’s New to Linux? Here’s Your Hitchhiker’s Guide to Linux Forum Galaxy!
Multi-booting My Way (Not Necessarily the Easy Way)
Posted: 24 April 2011 Filed under: How-tos | Tags: command line, distribution, edit, fdisk, GRUB, Linux, MBR, multi-booting, partitions, vim 3 CommentsThe following is a brief step-by-step on how I’ve been multi-booting different operatings systems on my machines for the past few years.
It’s not necessarily the easy way to do things. It is the way I first learned and the way that I’m most comfortable with using. I’m posting it here, as I believe it may be helpful to some Linux Explorers out there. This tutorial is based on GRUB Legacy. I do not use the new GRUB2 on my machines.
Here we go…
I have multiple drives on my system, so multi-booting becomes a bit more interesting. Currently, I have three hard drives installed. They are /dev/sda, /dev/sdb, and /dev/sdc. We won’t concern ourselves at all with /dev/sdc because it is primarily used as a common storage/backup drive. My operating systems are installed on /dev/sda and /dev/sdb.
I use /dev/sda (1st boot device in my BIOS) as the drive that has my primary operating system and my secondary operating system on it. I break my drives down into numerous partitions because I always install GNU/Linux operating systems on at least two partitions; /(root) and /home. I also have a common /swap partition on each drive that I plan on installing GNU/Linux distributions on.
My /dev/sda partitions look like this:
/dev/sda1 * 16065 51215219 25599577+ 83 Linux <– Slackware /(root)
/dev/sda2 51247350 153645659 51199155 83 Linux <– Slackware /home
/dev/sda3 153661725 488392064 167365170 5 Extended
/dev/sda5 153661788 204860879 25599546 83 Linux <– Arch /(root)
/dev/sda6 204877008 307275254 51199123+ 83 Linux <– Arch /home
/dev/sda7 307307448 311403959 2048256 82 Linux swap / Solaris
/dev/sda8 311420088 488392064 88485988+ 83 Linux <– Archives
My /dev/sdb partitions look like this:
/dev/sdb1 * 16384 51216383 25600000 7 HPFS/NTFS/exFAT <– MS Windows XP
/dev/sdb2 51232768 102432767 25600000 7 HPFS/NTFS/exFAT <– MS Windows Programs
/dev/sdb3 102453181 488270159 192908489+ 5 Extended
/dev/sdb5 102453183 106550639 2048728+ 82 Linux swap / Solaris
/dev/sdb6 106565823 137289599 15361888+ 83 Linux <– CentOS tester 1 /(root)
/dev/sdb7 137304783 188501039 25598128+ 83 Linux <– CentOS tester 1 /home
/dev/sdb8 188516223 219239999 15361888+ 83 Linux <– Foresight tester 2 /(root)
/dev/sdb9 219255183 270451439 25598128+ 83 Linux <– Foresight tester 2 /home
/dev/sdb10 270466623 301190399 15361888+ 83 Linux <– Debian tester 3 /(root)
/dev/sdb11 301205583 352401839 25598128+ 83 Linux <– Debian tester 3 /home
/dev/sdb12 352417023 383140799 15361888+ 83 Linux <– vacant tester 4 /(root)
/dev/sdb13 383155983 434352239 25598128+ 83 Linux <– vacant tester 5 /home
/dev/sdb14 434367423 488270159 26951368+ 83 Linux <– common storage
You get the above information on your drives using the fdisk -l command as root from the command line.
Alright then, let’s say that I now want to install Fedora Core Linux on my tester 4 partitions of /dev/sdb. Here’s how I would do that step-by-step:
1) Begin the Fedora installation setting /dev/sdb5 as swap, /dev/sb12 as /(root), and /dev/sdb13 as the /home partition from Fedora’s installer.
2) When the Anaconda installer reaches the point where it asks where I want to install the GRUB bootloader, I choose to SKIP installation of GRUB.
3) Once the install is finished, I reboot my main operating system (Slackware) and from the command line I mount the newly installed Fedora /(root) partition:
root_Slackware/home/vtel57:# mount /dev/sdb12 /mnt/tmp
*Note: I have a /mnt/tmp directory in my Slackware. If you don’t have a /mnt/tmp, just mount in /mnt. You’ll be fine.
4) I list the contents of the Fedora /boot directory:
root_Slackware/home/vtel57:# ls /mnt/tmp/boot
5) I copy down the vmlinuz and initrd information. You’ll be looking for the vmlinuz-<kernel version> and the initrd-<kernel version>.img files specifically. You’ll need that information for the next step.
6) I edit my /boot/grub/menu.lst file to add the new Fedora Core entry. Note: my MBR-controlling GRUB is in my secondary OS, Arch Linux. I can still mount and modify it from within Slackware, though.
root_Slackware/home/vtel57:# mount /dev/sda5 /mnt/tmp
root_Slackware/home/vtel57:# vim /mnt/tmp/boot/grub/menu.lst
I’ll add this entry to the file:
# Fedora Core
title fedora (t4)
root (hd1,11)
kernel /boot/vmlinuz-<kernel version> root=/dev/sdb12 ro
initrd /boot/vmlinuz-<kernel version>.img
7) I reboot and choose “fedora (t4)” from the GRUB menu to boot my new Fedora installation.
That’s it, folks. Straightforward, but not necessary the easiest way to do this. That’s the beauty of GNU/Linux. You can do it your way.
Have fun!
~Eric
P.S. I’m still working on the next shell scripting lesson. It’s going to be about variables and parameters, a necessary lesson for further BASH learning. Unfortunately, it’s also kinda’ complicated, so it’s taking me a bit to figure out how to formulate a lesson and still stay loyal to my primary goal here… keeping it as simple as possible. Stay tuned…
Beginning Shell Scripting
Posted: 10 April 2011 Filed under: Linux | Tags: BASH, built-in command, command line, echo, Linux, Linux shell, scripting, scripts, who 9 CommentsOK, let’s continue on with our lessons about the Linux Shell and the command line.
Today, we’re going to learn how to write a script that you can run from the command line that will actually do stuff. It’s a very simple script, so don’t expect anything spectacular. I was wondering what I could use as an example script for this lesson when I remembered a question someone at LinuxQuestions.org asked the other day about how to tell which users are currently logged into a Linux system. Let’s make a little script to give us that information.
Let’s say that Mary wants to see who is logged in on the Linux system that she maintains for her company. She could easily do this with one simple command from the command line:
mary@workplace:~$ who
bill pts/4 April 10 09:12
james pts/5 April 10 09:30
marjory pts/11 April 10 10:02
ken pts/16 April 10 10:31
That was pretty easy, right? What if Mary wanted to check this periodically during the day? Well, she could write a small shell script with the proper permissions that she could execute any time she wanted from the command line or the terminal within her graphical user interface. Let’s find out how she might do that.
Mary would first open the vim editor with the file name that she plans to use for this script:
mary@workplace:~$ vim onsys
Vim would faithfully carry out the command and open up ready to edit file onsys. At which point, Mary would enter these lines to create her script:
# custom who script – mary – 10 Apr 11
date
echo “Users currently logged into the system:”
who
# end of script
Here’s what Mary actually did… she made a comment in the first line that begins with the character #, so that the shell knows to ignore that line. In the next line, she sets the command “date” so the script will output the date along with whatever else she requests it to do. In line 4, she uses the built-in echo command to tell the shell to display whatever is being asked for following the echo command. In this case, Mary wants the script to display Users currently logged into the system: when she runs it. The next command that Mary enters into this little script is the built-in who command. And lastly, is her notation that the script has ended.
Now, to make this script work, Mary needs to make it executable. In other words, she has to change the file’s permissions to allow herself (and other, if she wants) to execute (make it run) the script onsys. She will do that this way:
mary@workplace:~$ chmod +x onsys
If she now listed the permissions for this file, they would look like this:
mary@workplace:~$ ls -l onsys
-rwxr-xr-x 1 mary users 94 Apr 10 15:21 onsys
What this means is that everyone on the system can read and execute this script, but only mary can write to (change) it.
OK, so Mary wants to test her script now, so she just types in the script name at the command line (assuming the script is in her working directory):
mary@workplace:~$ onsys
Sun Apr 10 15:48:09 EDT 2011
Users currently logged into the system:
bill pts/4 April 10 09:12
james pts/5 April 10 09:30
marjory pts/11 April 10 10:02
ken pts/16 April 10 10:31
And so, there you have it. Mary wrote a simple script using shell built-in commands to perform a function that she does repetitively every day. That’s what scripts do. They perform tasks for us at our bidding. Of course, scripts can get much more complicated; so complicated in fact as to be considered applications in their own right. A script is just a series of encoded commands and variables designed to do something, which is basically what an application is also.
Start yourself a directory in your /home directory where you can create and play around with scripting and scripts. It can really be fun. You can “automate” a lot of every day stuff that you do on your computer using custom-made scripts. Yes, you can do it. It ain’t rocket science. It is similar to the technology used to program rockets, though.
Have FUN!
~Eric
Pimp My Bash Prompt
Posted: 8 April 2011 Filed under: How-tos | Tags: BASH, bash prompt, command line, customize, how-to, Linux, securitybreach 14 CommentsIn the next couple lessons here at Nocturnal Slacker v1.0 we’ll be discussing the Bourne Again Shell (BASH) in a bit more detail.
With that in mind, though, how ’bout we play around with a neat trick that will customize your BASH prompt whenever you go to the command line? Sound like fun? OK, here we go…
There’s a file in your /home/<your_username> directory called .bashrc. You’ll need to use the -a (all) option when listing (ls) that directory because the preceding . means it’s a hidden file. So, let’s see how joe would do this…
joe@mysystem:~$ ls -a .bashrc
.bashrc
There we go. So Joe now knows that he does have a .bashrc file in his /home directory. Now, let’s say that Joe wants a cool BASH prompt like mine:
vtel57_Slackware~:$
… that shows his username, his operating system, and his working directory. To do this, Joe is going to have to add a little data to his .bashrc file. He’ll edit the file using the VIM command line editor. Remember that from a previous lesson? Here goes Joe…
joe@mysystem:~$ vim .bashrc
And poof! Up comes VIM with the .bashrc file ready to be edited. It’s almost like magic, huh?
# /home/joe/.bashrc
# custom prompt
PS1=”\u | archlinux\w:$ “
Joe is going to edit the .bashrc file to add the little bit in purple that you see above. What that will do is tell BASH to start up the command line with a prompt the shows Joe’s usersname (u), his distribution (ArchLinux) separated by the | (pipe) character; and his working directory (\w). After saving the file, this is what Joe’s command line prompt will look like once he starts his next BASH session:
joe | archlinux~:$
Pretty neato, huh? Remember the ~ denotes the home directory. If Joe was to change directories (cd) to say /boot/grub, then his prompt would now change too to show the new working directory.
joe | archlinux~:$ cd /boot/grub
joe | archlinux/boot/grub:$
Again, pretty neato, huh? This way, Joe will always know what directory he’s in at any given time. That will help prevent Joe from making any command line boo-boos.
That’s it, guys and gals. Pretty simple stuff. See? You’re not near as scared of that mean ol’ command line as you used to be, huh? Use your imagination when customizing your prompt. I’ve seen some pretty cool ones out there. Here’s the one my friend securitybreach and fellow Admin from Scot’s Newsletter Forums – Bruno’s All Things Linux uses:
╔═ comhack@Cerberus 02:27 PM
╚═══ ~/->
How’s that for spiffy? For further reading see HERE and HERE.
Have a great weekend wherever you may be!
~Eric
Squish, Bang, Zip… So You Want to Archive and Compress/Decompress Files?
Posted: 7 April 2011 Filed under: Linux | Tags: archives, bzip2, command line, compression, decompression, download, files, gzip, Linux, server, tar, upload 1 CommentLet’s continue now with our series of articles introducing new Linux Adventurers to the Linux shell, the command line, and command line editing.
Sometimes, there is a need to stuff a bunch of files into an archive and compress it. This is often the case when one wants to send a bunch of large files to someone else via email or serve them on a server. This practice came about in the old days of computing when disk space was at a premium. Even though disk space is now huge and cheap, bandwidth can still be tight in some cases, so archiving and compressing files is still an efficient way to store/transport them on your system or move them across the Internet.

Let’s say our old pal Joe had three files that he wants to shove into an archive for storage on his own system. His files are text1.txt, joemama.text, and umeume.txt. Here’s how Joe would archive these three files using the tar command. Tar stands for tape archive. It’s been around since Noah ran Slackware on the Ark.
joe@mysystem:~$ tar -cvf joesstuff.tar text1.txt joemama.txt umeume.txt
Here’s what the above command does… it takes the three files listed at the end of the command and stuffs them (-c = create, -v = verbose, -f = read/write to file) into an archived file called joesstuff.tar.
OK, so far? Alright then… what if Joe’s three files were pretty big and he wants to send them to his buddies Bill, Mary, and Tom via his online server? Well, in that case Joe would want to compress his new archive using a compression application. Remember the old WinZip program in Windows? Well, Linux has some similar applications to squish files into smaller packages. Two that we’ll talk about here are bzip2 and gzip.
So, Joe wants to compress his new archive file with bzip2 for starters. Here’s how he does it:
joe@mysystem:~$ bzip2 -v joesstuff.tar
Now when Joe lists (ls) his contents of the directory he’s working in, he will find that his original joesstuff.tar is now called joesstuff.tar.bz2. Cool, huh? The size will be smaller, too, because the archive has been compressed. Joe could now upload the file to his online server to share with his friends.
Another compression method that Joe could use is gzip. Here’s how Joe would do that:
joe@mysystem:~$ gzip -v joesstuff.tar
If Joe used gzip to compress his archive, it would now be called joesstuff.tar.gz.
Now let’s say that Mary downloaded the joesstuff.tar.bz2 to her computer and wanted to actually see/read the files it contained. She would have to decompress the archive first. She would do this from her command line with this command:
mary&larry@home:~$ bunzip2 joesstuff.tar.bz2
This command would “unzip” (decompress) the package leaving Mary with Joe’s original archive –> joesstuff.tar. If Joe had put the archive on his server as a gzip compressed archive, Mary would use this command instead to unzip it:
mary&larry@home:~$ gunzip joesstuff.tar.gz
Either way, she’d still end up with Joe’s original archive –> joesstuff.tar. Now though, she will need to unpack the archive in order to read the individual files. She can unpack the tar archive this way:
mary&larry@home:~$ tar -xvf joesstuff.tar
Now, when Mary lists (ls) the contents of her working directory, she would see the original joesstuff.tar and the three files that she just extracted (-x) from the archive.
mary&larry@home:~$ ls
joesstuff.tar
text1.txt
joemama.txt
umeume.txt
That’s it, folks. Those are the basics of archiving and compressing/decompressing files in Linux using the command line tools tar, bzip2, and gzip. Be sure to refer to the man pages for these commands to get some more good information. Remember how to get to the man pages? You can either read them online at places like linuxmanpages.com or you can access them right there on your own computer using the command line by entering:
you@your_computer:~$ man tar
TAR(1) BSD General Commands Manual TAR(1)
NAME
tar — The GNU version of the tar archiving utility
SYNOPSIS
tar [-] A –catenate –concatenate | c –create | d –diff –compare |
–delete | r –append | t –list | –test-label | u –update | x
–extract –get [options] [pathname …]
DESCRIPTION
Tar stores and extracts files from a tape or disk archive.
The first argument to tar should be a function; either one of the letters
Acdrtux, or one of the long function names. A function letter need not
be prefixed with “-”, and may be combined with other single-letter
options. A long function name must be prefixed with –…
I hope you’ve learned something from this lesson.
Later…
~Eric
A (Very) Brief Introduction to VIM
Posted: 5 April 2011 Filed under: Linux | Tags: command line, editors, Linux, nano, vi. emacs, vim 9 CommentsPreviously here, while discussing the Linux shell, we briefly touched upon the need to have a command line editor that you’re comfortable using.
While there are quite a few very good editors out there (EMACS, Nano, etc.), vi/vim are my favorites. Some would say that I’m into self-flagellation to like vi/vim, but I think it’s probably due to the fact that they were my first exposure to command line editors. I’ve only recently found and used Nano (in Arch Linux). It’s pretty cool, but vim is my baby when it comes to editing on the command line.
Billions of electrons have been spent discussing the merits of one editor over another. We’re not going there today, though. I’ve become kinder to electrons in my old age. Instead, I’m going to show you the very basics you need to create or edit an existing text file from the command line using vim (vi – improved). If you learn just these few simple keystrokes, you should be able to edit a file should you ever need to.
OK, let’s start with how to start vim in the command line. Well, that’s pretty simple. Here are a couple ways. You can just type the executable for vim into your command line:
joe@mysystem:~$ vim
If you do it this way, the command will tell vim that a not-too-experienced user just called up the application and it will come up assuming you need some help:

That is the vim intro page. Now, a bit more experienced user will never see that page because he/she knows how to start vim in another way. Let’s say that we want to create a text file called testing and open it in vim ready-to-edit. This is how user Joe would do that:
joe@mysystem:~$ vim testing
In this example, a wiser Joe knows that this command will open the vim editor application with file testing just sitting there waiting to be edited, or created, in this case.
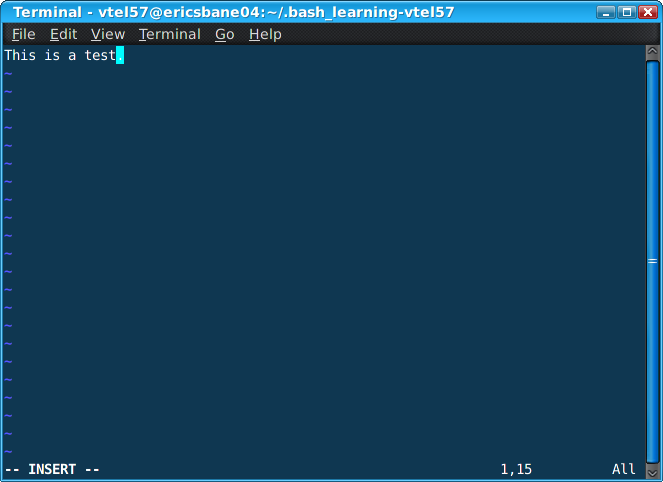
You can see that Joe has typed in a bit of text already. He must have done that when I got up to get my coffee refilled. Sneaky guy, ain’t he? Anyway, You’ll also notice at the bottom left of the editor window is the word INSERT. What this means is that vim is in one of its Input modes. The other mode is the Command mode, but we’ll get to that in just a sec.
To get into the Input mode, you would press the key i on your keyboard. This would put vim into the Insert mode right where the cursor is. If you hit the a key instead to get into the Input mode, vim will advance the cursor one spot and then enter Input mode. You can also get into the Input mode on most keyboards by using the Insert key, which is usually located just above the Delete key in that block of six keys just above your navigation (arrow) keys.
Oh, and speaking of those arrow keys… those are used to navigate within the file while using vim. You can also use the h, j, k, and l keys to move left, down, up, right, respectively. When you’re done moving and typing, you can leave the Input mode and enter the Command mode by using the ESC key in the upper left of your keyboard. Once in Command mode, you can do another very important chore that everyone needs to know how to do when editing text files… save your work. To save the testing file, just type this while in Command mode:
:wq
This command tells vim to write the file (save it) and quit vim. Here’s what that looks like:
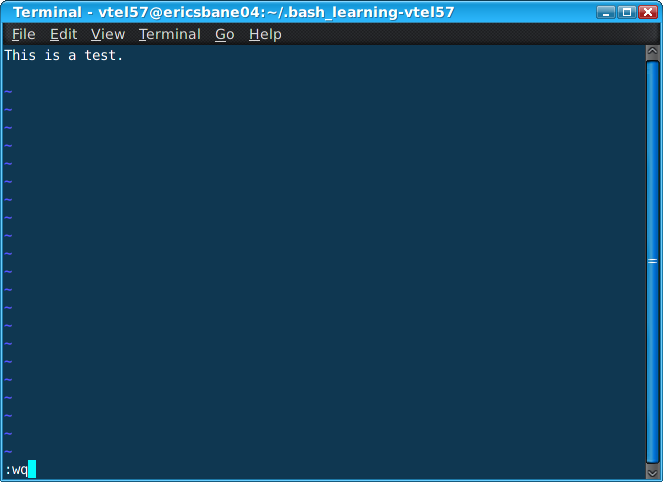
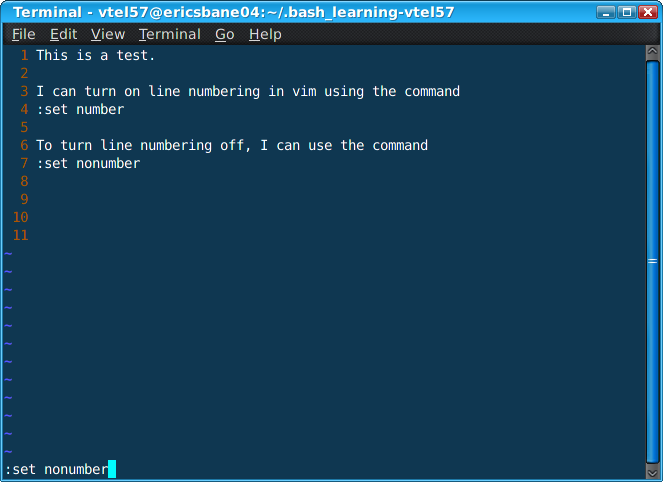
Here’s another neat trick, too. Some folks like to see the line numbers displayed while editing a file. Actually, often it’s a necessity when editing code files. To display the line numbers in vim just enter this command while in the Command mode:
:set number
To turn the numbering off use:
:set nonumber
Here’s a look at that in the vim editor:
You see? There’s nothing really to be afraid of while using vim. It’s nowhere as near as scary as folks would have you believe, huh? When you get a little practice with it and start learning some more of its tricks and shortcuts, it’s really a cool little editor. Oh, and don’t forget to type:
:help
while in Command mode. It will bring up all kinds of useful vim info. For further reading, check out vim’s website and the man page. Of course, you can access the man page from your own computer using the command line:
joe@mysystem:~$ man vim
I hope this lesson on the vim editor has been helpful to you. Don’t let it scare you. Just open up your terminal in Ubuntu or Mint or whatever your favorite GNU/LINUX distro is and create and play around with a practice file using vim. It’s a great way to learn without risking breaking something.
Stay tuned… next up we’re going to learn a little bit about archiving, compressing, and decompressing files using tar, gzip, and bzip2. Should be fun.
Until then…
~Eric
An Introduction to the Linux Shell
Posted: 5 April 2011 Filed under: Linux | Tags: BASH, command line, GUIs, Linux, Linux shell, ls, terminal, vim 7 CommentsShe sells seashells by the seashore. Well, yes… that may be true, but that’s not the type of shell we’re going to talk about here today.
I’m going to talk a bit about the Linux shell. What is the Linux shell? What does it do? How can I interact with it on my GNU/Linux operating system? Those are all good questions. While today’s most popular distributions of GNU/Linux are morphing into operating systems that are more and more graphic user interface oriented, the real power of Linux still resides in the command line.
When you boot up your Ubuntu or Mandriva GNU/Linux operating systems, most of you see a graphical login screen. Others, like myself, might see a non-graphic command line login. Both do basically the same thing. They log the user into the Linux shell so that he may begin to utilize his system’s potential to perform tasks. That’s what we do with our computers, regardless of what the tasks happen to be… emailing pics to auntie Myrtle or hacking cloud and cluster security systems.
The Linux shell is the interface between you in that seat in front of your monitor and the operating system that controls the hardware in that box under the desk that does the actual stuff you want done. There are numerous shells in Linux; the most commonly used one is called BASH – Bourne Again Shell. You’re in the shell anytime you’re logged into your GNU/Linux operating system; whether you’re interacting with it graphically or from the command line.
Graphic User Interfaces or GUIs are just “front ends” to applications that are running in the shell. I’ll be talking mostly about the non-graphical command line interface here today, though. You can access your command line interface from within your GUI by using the graphic front end application for the command line provided by your desktop environment. For example, in Gnome, you could use Gnome Terminal; or in KDE, you could use Konsole. Either way, these are both just graphical front ends for the BASH shell command line.
When you first login, you’ll get what’s known as a prompt. It is just a blank line waiting for your input (commands). It’ll look something like this:
joe@mysystem:~$
The first part, “joe”, is just the user’s login name. “@mysystem” is the name of the computer the user is logged into. The “~” character tells us that user Joe is working from his home directory. The “$” character is the standard character denoting a non-root, regular user.
Let’s say Joe wants to list all the files in his home directory. All he has to do is type:
joe@mysystem:~$ ls
This command, known as “list”, tells the shell that user Joe wants to see a list of all the contents of his home directory. The shell immediately responds after Joe hits the Return (Enter) key on his keyboard with this output:
Desktop joe_archives joe_common joe_private
Dropbox joe_backups joe_downloads
It looks like Joe has five regular directories, a Dropbox directory, and the directory that contains his desktop icons. In reality, there are more directories and files in Joe’s home directory, but they’re what are known as “hidden” files. Their names are usually preceded by a .(period) to make them hidden. If joe wants to see all his directories and files he can list them this way:
joe@mysystem:~$ ls -a
The “-a” option means all. The list command will list all items in a directory when using the -a option. Joe’s list now looks something like this:
.dropbox .macromedia .thunderbird
.ICEauthority .esd_auth .moz_icons .viminfo
.PySolFC .fontconfig .mozilla .wicd
.Xauthority .gconf .mozilla_3.x .xchat2
The above directories are hidden by the preceding .(period), as mentioned above.
Let’s say Joe want’s to create a grocery list for his afternoon shopping chores. He can do this via the shell and command line also by using a command line editor such as vim. He would first do this by bring up the vim application in the command line interface:
joe@mysystem:~$ vim groceries
This command would initiate the vim application using a new file called “groceries”. Vim or Vi-Improved, as it’s known, is a non-graphical text editing application. It would look something like this to Joe:
lettuce
tomatoes
catfood
peanut butter
eggs
milk
bread
~
~
~
–INSERT– 10,1 All
Once Joe had finished typing out his grocery list, he would save it using the vim command :wq, which would also close the vim application and bring Joe back to the command line prompt. He could also print his list from the command line like this:
joe@mysystem:~$ lpr groceries
The lpr command would tell the shell that Joe wants to output the contents of the groceries file to the printer. The printer would receive the data and the command to print from the computer’s hardware and begin printing Joe’s grocery list.
All of this we’ve talked about today doesn’t even scratch the surface of the power at your finger tips when using the Linux shell. Your first step should be to read the Linux manual page for the BASH shell. There is some very useful information in that document. Stay tuned here… I’ll come up with some other lessons in the future. Remember what I always say…

Learn something. It won’t hurt you none. I promise.
Later…
~Eric
*This was previously posted on my old Nocturnal Slacker (@LockerGnome) blog and on the Community Blogs at Linux.com. I’m reposting it here to keep the series all in one place.


A Few More Shell Basics
Posted: 14 April 2011 | Author: V. T. Eric Layton | Filed under: Linux | Tags: background, BASH, chmod, command line, commenting, foreground, group commands, lesson, Linux, symbols | 3 CommentsIn our last lesson here, I scratched the surface of the basics needed to start scripting in BASH. Today, we’ll learn a few more things.
Here are some fundamentals that we need to cover real quick. It’s nothing too complicated.
chmod – You’ve seen this command in action before, I’m sure. It’s important when it comes to writing shell scripts because it allows the script to become executable. This is, of course, a necessity if we want the script to actually run and do something.
#! – These two symbols used in this particular order at the beginning of a script specifies which shell we want to use to run this script. We will primarily be talking about BASH here in these lessons, but let’s say we wanted to write a script that used the tcsh shell instead. The first line of the script would be:
#!/bin/tcsh
The operating system would check that first line initially to determine what shell we intended when we wrote the script. It would then call up that shell and run the script. You’ll see that a lot when programming in BASH. Now you know what it does.
# – This symbol signifies a comment. You’ve probably seen this many times already in configuration files like GRUB’s menu.lst or your distribution’s repository configuration file, maybe. It’s not at all uncommon to find this symbol used in many different programming languages to alert the OS (and the user) that the data on the same line following the # is an informational comment of some sort. Comments are GOOD things when programming. Make lots of comments. They will help you and maybe others who use your program or script down the road. Here’s an example of a commented snippet of script:
#!/bin/bash
# ZIP-100 mknod script – 07222006 – Bruno
mknod /dev/hdb4 b 3 64
#End script
You can see the initial #! telling the OS what shell to use. In the next line, you can see the # symbol followed by some informational data. This was an actual script that I used to need to run at boot to get my ZIP-100 drive to be recognized by the OS. Newer kernels later on solved the issue by using udev, but that’s a whole ‘nother subject. I just wanted you to see what a comment looks like in a BASH script.
; and <newline> – These two devices, when used in the shell, denote a transition from one command to another. For example, if I had three commands called c1, c2, and c3, I could run them on the same line using the ; (semi-colon) to separate them. Or I could just put each of them on a new line. Here’s what I mean…
$ c1;c2;c3 <ENTER to execute>
$ c1 <ENTER>
$ c2 <ENTER>
$ c3 <ENTER>
Pretty simple so far, huh? OK. Let’s continue…
\ – The backward slash is used to continue a command from one line to the next. Like this:
$ echo “She sells seashells \
> by the seashore.” <ENTER>
She sells seashells by the seashore.
Without the \, the line would have been broken when displayed by the echo command’s output. Like this:
$ echo “She sells seashells
> by the seashore.” <ENTER>
Sea sells seashells
by the seashore.
See the difference? Cool! OK, then… just a few more for today. We don’t want to get a headache by stuffing too much in there at one time.
| and & – These two are very cool, and you’ll see them a lot. The first one is called a “pipe”, and that’s just what it does. It pipes output of one command into the input of another. The ampersand (&) symbol tells the shell to run a command in the background. I should briefly diverge here for a moment and mention foreground and background operations so you’ll understand what they are.
A quick sidebar lesson…
You can run a command in the foreground (actively running before your eyes) or in the background (hidden from view but still going). The way to do this is to use the bg and fg command modifiers in the command line. Let’s look a a couple simple examples. Let’s say Mary wants to run some big admin job in the background while she does other stuff in the foreground. It’s pretty easy to do. First she starts big_job01 from the command line.
mary@workplace:~$ big_job01
bla-bla-bla-big_job_running_now-bla-bla-bla
With big_job01 running actively in the foreground, Mary doesn’t have a cursor blinking at the command line. She cant do any other work because she has to watch big_job01 outputting. To change this, Mary will “background” big_job01 to bring back her command line cursor so she can do other things.
CTRL+Z
What this combination of keystrokes will do for Mary is it will stop the process big_job01, giving this notification:
1]+ Stopped big_job01
Now Mary will get her cursor back and she can send the big_job01 to the background and get it running again.
mary@workplace:~$ bg 1
She can check to see that it’s in the background and running by listing the jobs.
mary@workplace:~$ jobs -l
1]+ 4107 Running big_job01 &
Note the following & in the above line. That’s telling Mary that big_job01 is running in the background. Cool, huh? Now Mary can go on about her other chores in the foreground as she normally would. When big_job01 finishes, the command line will give Mary a notification like this:
1]+ Done big_job01
OK, there you have it… a bit about backgrounding and foregrounding operations within the shell. Now let’s go back to what we were talking about before.
( and ) – The parenthesis are used in shell scripting to group commands. The shell will actually create a copy of itself, called a sub-shell, for each group. Groups are seen by the shell as jobs and process IDs are created for each group. Sub-shells have their own environment; meaning they can have their own variables with values different from other sub-shells or the main shell. A bit confusing, huh? Well, let’s see a quick example and then wrap up this lesson so we can all go watch C.S.I. on TV.
$ (c1 ; c2) & c3 &
In the above example, grouped command c1 and c2 would execute sequentially in the background while executing command c3 in the background. Remember that we can background commands by using the ampersand (&) symbol and separate commands by using the semi-colon (;). The prompt would return immediately after hitting ENTER on the line above because both jobs would be running in background. The shell would run the grouped commands c1 and c2 as one job and c3 as another job. Clear as chocolate pudding, huh? Don’t worry. It’ll all come together… I hope.
Until next time….
~Eric
Share: