
Today’s Featured Distribution – Salix OS
Posted: 9 February 2012 Filed under: Linux, Other Distributions | Tags: Absolute Linux, distribution, GRUB, Gslapt, Linux, menu.lst, package manager, review, Salix OS, Slackware, slapt-get, Vector Linux, Zenwalk 4 CommentsSalix is a GNU/Linux distribution based on Slackware that is simple, fast and easy to use.
![]() As many of you know, I’m partial to distributions with the Slackware pedigree. Salix is one that I had not tried before. My favorites up to now have been Zenwalk, Absolute Linux, and Vector Linux. However, I haven’t had any of those on any of my systems for quite some time. I’m patiently waiting for the 64 bit versions.
As many of you know, I’m partial to distributions with the Slackware pedigree. Salix is one that I had not tried before. My favorites up to now have been Zenwalk, Absolute Linux, and Vector Linux. However, I haven’t had any of those on any of my systems for quite some time. I’m patiently waiting for the 64 bit versions.
Now with Salix OS, I find a nice 64 bit version all ready to go. I installed it with the Xfce desktop. Installation was fast and easy using their familiar installer. No surprises here, folks. It just works. I had to do a couple custom tweaks here and there to get the system up and running, though.
After installation, I first booted into Salix using the kernel line alone. On my main system, Arch (my secondary OS) controls the MBR, and its GRUB rules. I had to modify Arch’s menu.lst to boot Salix. Once I was in Salix, I created an initrd using the README.initrd that you can find in most Slack derivatives. Nothing new here either. For you Slack veterans, this will all look very familiar to you. I re-edited Arch’s menu.lst to include the newly created initrd.gz line and away we went. Anyway, most of you will just use the LILO boot loader provided by Salix.
Salix booted up without a burp or hiss. I updated right off using the tried and true slapt-get command line package manager. Anyone who’s ever run Vector or Absolute Linux would be familiar with slapt-get. It’s a cool PM. The GUI frontend in Salix is gslapt. You can set up auto-updates with it. Makes you feel like you’re running Ubuntu, almost. 😉
After updating, I performed my usual Xfce customizations and then took a little screenie for you to look at:
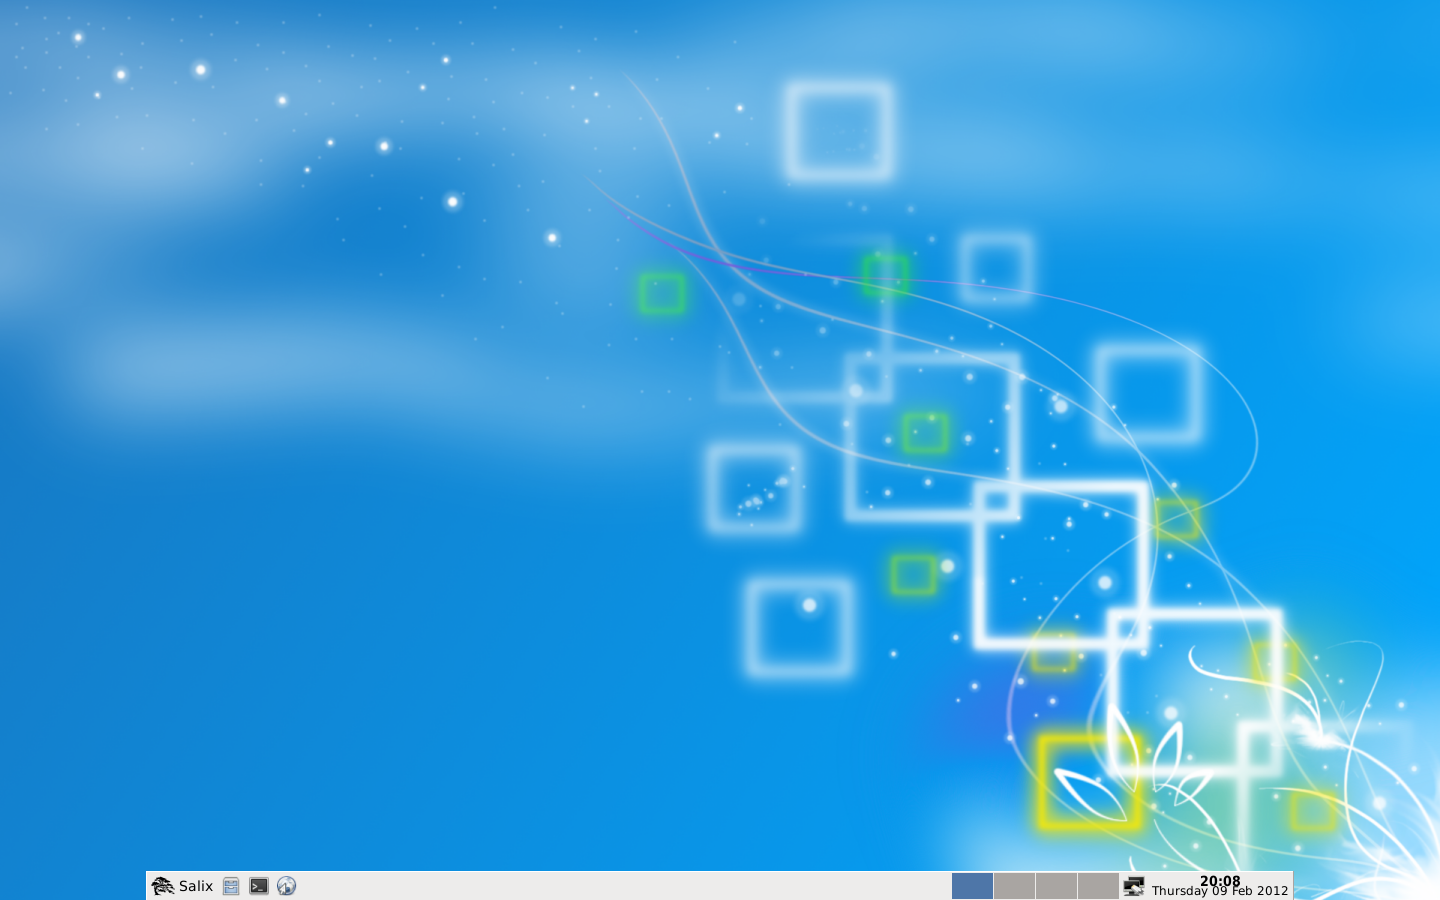
Salix OS has the legendary stability of its parent Slackware along with some ease-of-use features, like the GUI package manager gslapt, more often found in more graphically oriented distributions. You grizzled Slackers will feel comfortable with it. You folks who’ve always wanted to run Slackware, but were afraid to, will love Salix OS. It’s not as hardcore as Slackware. It’s perfect for someone with only minimal GNU/Linux experience. That doesn’t mean it’s a minimal or hand-holding distro. Salix OS is a full-powered GNU/Linux operating system, fully capable of running your little laptop or that business server.
Go visit the excellent Salix OS website and download a copy for yourself. Give it a try. You might be pleasantly surprised. While you’re there, check out the Salix Team of hardworking individuals whose passion and labors have made this wonderful distribution possible.
Later…
~Eric
Image credits: Salix OS logo owned by Salix OS
Multi-booting My Way (Not Necessarily the Easy Way)
Posted: 24 April 2011 Filed under: How-tos | Tags: command line, distribution, edit, fdisk, GRUB, Linux, MBR, multi-booting, partitions, vim 3 CommentsThe following is a brief step-by-step on how I’ve been multi-booting different operatings systems on my machines for the past few years.
It’s not necessarily the easy way to do things. It is the way I first learned and the way that I’m most comfortable with using. I’m posting it here, as I believe it may be helpful to some Linux Explorers out there. This tutorial is based on GRUB Legacy. I do not use the new GRUB2 on my machines.
Here we go…
I have multiple drives on my system, so multi-booting becomes a bit more interesting. Currently, I have three hard drives installed. They are /dev/sda, /dev/sdb, and /dev/sdc. We won’t concern ourselves at all with /dev/sdc because it is primarily used as a common storage/backup drive. My operating systems are installed on /dev/sda and /dev/sdb.
I use /dev/sda (1st boot device in my BIOS) as the drive that has my primary operating system and my secondary operating system on it. I break my drives down into numerous partitions because I always install GNU/Linux operating systems on at least two partitions; /(root) and /home. I also have a common /swap partition on each drive that I plan on installing GNU/Linux distributions on.
My /dev/sda partitions look like this:
/dev/sda1 * 16065 51215219 25599577+ 83 Linux <– Slackware /(root)
/dev/sda2 51247350 153645659 51199155 83 Linux <– Slackware /home
/dev/sda3 153661725 488392064 167365170 5 Extended
/dev/sda5 153661788 204860879 25599546 83 Linux <– Arch /(root)
/dev/sda6 204877008 307275254 51199123+ 83 Linux <– Arch /home
/dev/sda7 307307448 311403959 2048256 82 Linux swap / Solaris
/dev/sda8 311420088 488392064 88485988+ 83 Linux <– Archives
My /dev/sdb partitions look like this:
/dev/sdb1 * 16384 51216383 25600000 7 HPFS/NTFS/exFAT <– MS Windows XP
/dev/sdb2 51232768 102432767 25600000 7 HPFS/NTFS/exFAT <– MS Windows Programs
/dev/sdb3 102453181 488270159 192908489+ 5 Extended
/dev/sdb5 102453183 106550639 2048728+ 82 Linux swap / Solaris
/dev/sdb6 106565823 137289599 15361888+ 83 Linux <– CentOS tester 1 /(root)
/dev/sdb7 137304783 188501039 25598128+ 83 Linux <– CentOS tester 1 /home
/dev/sdb8 188516223 219239999 15361888+ 83 Linux <– Foresight tester 2 /(root)
/dev/sdb9 219255183 270451439 25598128+ 83 Linux <– Foresight tester 2 /home
/dev/sdb10 270466623 301190399 15361888+ 83 Linux <– Debian tester 3 /(root)
/dev/sdb11 301205583 352401839 25598128+ 83 Linux <– Debian tester 3 /home
/dev/sdb12 352417023 383140799 15361888+ 83 Linux <– vacant tester 4 /(root)
/dev/sdb13 383155983 434352239 25598128+ 83 Linux <– vacant tester 5 /home
/dev/sdb14 434367423 488270159 26951368+ 83 Linux <– common storage
You get the above information on your drives using the fdisk -l command as root from the command line.
Alright then, let’s say that I now want to install Fedora Core Linux on my tester 4 partitions of /dev/sdb. Here’s how I would do that step-by-step:
1) Begin the Fedora installation setting /dev/sdb5 as swap, /dev/sb12 as /(root), and /dev/sdb13 as the /home partition from Fedora’s installer.
2) When the Anaconda installer reaches the point where it asks where I want to install the GRUB bootloader, I choose to SKIP installation of GRUB.
3) Once the install is finished, I reboot my main operating system (Slackware) and from the command line I mount the newly installed Fedora /(root) partition:
root_Slackware/home/vtel57:# mount /dev/sdb12 /mnt/tmp
*Note: I have a /mnt/tmp directory in my Slackware. If you don’t have a /mnt/tmp, just mount in /mnt. You’ll be fine.
4) I list the contents of the Fedora /boot directory:
root_Slackware/home/vtel57:# ls /mnt/tmp/boot
5) I copy down the vmlinuz and initrd information. You’ll be looking for the vmlinuz-<kernel version> and the initrd-<kernel version>.img files specifically. You’ll need that information for the next step.
6) I edit my /boot/grub/menu.lst file to add the new Fedora Core entry. Note: my MBR-controlling GRUB is in my secondary OS, Arch Linux. I can still mount and modify it from within Slackware, though.
root_Slackware/home/vtel57:# mount /dev/sda5 /mnt/tmp
root_Slackware/home/vtel57:# vim /mnt/tmp/boot/grub/menu.lst
I’ll add this entry to the file:
# Fedora Core
title fedora (t4)
root (hd1,11)
kernel /boot/vmlinuz-<kernel version> root=/dev/sdb12 ro
initrd /boot/vmlinuz-<kernel version>.img
7) I reboot and choose “fedora (t4)” from the GRUB menu to boot my new Fedora installation.
That’s it, folks. Straightforward, but not necessary the easiest way to do this. That’s the beauty of GNU/Linux. You can do it your way.
Have fun!
~Eric
P.S. I’m still working on the next shell scripting lesson. It’s going to be about variables and parameters, a necessary lesson for further BASH learning. Unfortunately, it’s also kinda’ complicated, so it’s taking me a bit to figure out how to formulate a lesson and still stay loyal to my primary goal here… keeping it as simple as possible. Stay tuned…
Ericsbane05 LIVES!
Posted: 18 April 2011 Filed under: Hardware | Tags: Arch Linux, CompUSA, device map, ericsbane, ericslaptop, ericsshop, framerate, GRUB, hard drives, micro, motherboard, S.T.A.L.K.E.R., Slackware, Tiger Direct 9 CommentsWhat is ericsbane? Well, that’s what I name some of my computers. I also have ericslaptop01 and ericsshop01 and 02.
What a strange name this ericsbane thing. Where’d that come from? you might be wondering. The definition of bane is a person or thing that ruins or destroys or the name of a deadly poison. HA! Both are accurate sometimes when it comes to my computering hobby. Computers can be my bane, but I love ’em, anyway.
As some of you may know from reading here and here, I have been having some hardware issues with my main system. And as a sidebar to this, I’ve also been trying to put together a system for my shop. Well, it’s finally all come together. What a nightmare it’s been. Of course, if I had money to burn, this wouldn’t have been an issue at all. Unfortunately, money is very tight right now. We won’t even go into that.
So, what happened this weekend? I woke up Saturday morning jonesing to play one of my vid games on my system. S.T.A.L.K.E.R., Far Cry, Deus Ex, anything. I just wanted to frag stuff. Know what I mean? I haven’t been able to play any games on my main system due to issues with a bad PCIe socket, which has forced me to use crappy onboard graphics. Hmm… can’t play many games these days with a 2900fps framerate.
I made the mistake of going to the local CompUSA (Tiger Direct) store after seeing a really decent mobo/micro bundle advertised online. Hmm… I had spent a few bucks recently on a replacement mobo from them, but it didn’t work out, so I was given a refund. I figured that money was already spent. I had it set aside for a rainy day. Well, that day was Saturday. I went to the CompUSA and got myself a mobo/micro combo.
I came home and, after much travail and gnashing of teeth, I managed to cobble together ericsbane05. Here are the specs:
Cooler Master Chassis Mid Tower Elite 334 Nvidia Edition ATX Casing
Cooler Master Extreme Power Plus – 650watt power supply
785GTM-E45 socket AM2+ motherboard
AMD Phenom 9750 Quad-Core Processor
AMD chipset
4Gig Centon DDR2 800 PC-6400 RAM DDR 800 (slots 1 & 2)
EVGA Nvdia GeForce 450 GTS
IDE 0 Master: Master: DVD Writer 840
IDE 0 Slave: ZIP 100
SATA 0: Western Digital 250Gig
SATA 1: Western Digital 250Gig
SATA 2: Western Digital 250Gig
SATA 3: HLDS GH30N DVD±RW
Standard 3.5″ floppy
Seven (7) cooling fans
=====
HP Deskjet 842C printer
HP Scanjet 3400 flatbed scanner
HP W1907 LCD monitor
Altec Lansing (front) + Harman Kardon (rear) speakers
Dell USB keyboard
Logitech Trackball mouse
So, there ya’ have it. Here’s what the framerate on this baby looks like now:
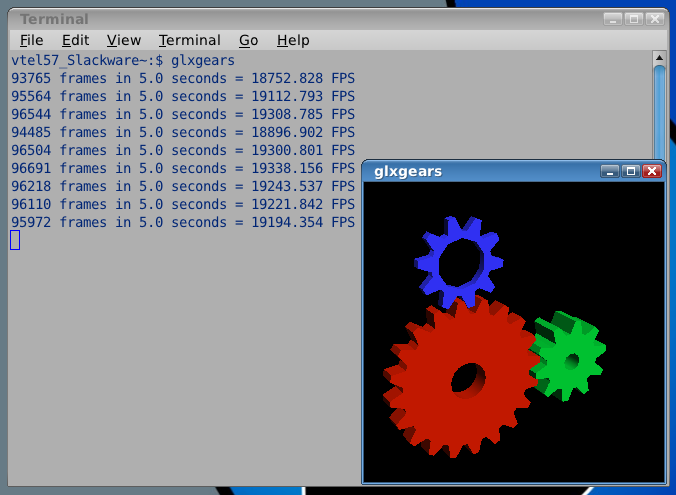
So much gooder! I can play games again! I can shoot and frag away my frustrations. It’s better than religion, I’m telling you. Woo-hoo!
Oh, and as a by-product of this adventure, I also was able to salvage ericsbane04. I slapped the guts of that system into another box and changed its name to ericsshop02. It’s loaded with Slackware current and is sitting on the bench outside in my shop. I put ericsshop01 on the shelf as a backup system. We are just on a roll here, huh?
I have 99.9% of the kinks worked out of the new ericsbane05. There are always issues when you install pre-existing operating systems onto new hardware. There are issues with drivers, disk nomenclature, sensor daemons, GRUB, etc. I’ve got them all squared away but one, I think. I’m having a minor issue with Arch’s GRUB, the bootloader for my entire system (numerous operating systems installed). It has incorrectly mapped the hard drives. I’m working on it, though.
That, friends, is how I spent the last three days of my life. Bane, indeed. See what I mean?
We’ll have some new lessons coming along shortly. Stay tuned…
Until next time…
~Eric, the happy 19000fps framerate, fraggin’ Slacker!