Multi-booting My Way (Not Necessarily the Easy Way)
Posted: 24 April 2011 Filed under: How-tos | Tags: command line, distribution, edit, fdisk, GRUB, Linux, MBR, multi-booting, partitions, vim 3 CommentsThe following is a brief step-by-step on how I’ve been multi-booting different operatings systems on my machines for the past few years.
It’s not necessarily the easy way to do things. It is the way I first learned and the way that I’m most comfortable with using. I’m posting it here, as I believe it may be helpful to some Linux Explorers out there. This tutorial is based on GRUB Legacy. I do not use the new GRUB2 on my machines.
Here we go…
I have multiple drives on my system, so multi-booting becomes a bit more interesting. Currently, I have three hard drives installed. They are /dev/sda, /dev/sdb, and /dev/sdc. We won’t concern ourselves at all with /dev/sdc because it is primarily used as a common storage/backup drive. My operating systems are installed on /dev/sda and /dev/sdb.
I use /dev/sda (1st boot device in my BIOS) as the drive that has my primary operating system and my secondary operating system on it. I break my drives down into numerous partitions because I always install GNU/Linux operating systems on at least two partitions; /(root) and /home. I also have a common /swap partition on each drive that I plan on installing GNU/Linux distributions on.
My /dev/sda partitions look like this:
/dev/sda1 * 16065 51215219 25599577+ 83 Linux <– Slackware /(root)
/dev/sda2 51247350 153645659 51199155 83 Linux <– Slackware /home
/dev/sda3 153661725 488392064 167365170 5 Extended
/dev/sda5 153661788 204860879 25599546 83 Linux <– Arch /(root)
/dev/sda6 204877008 307275254 51199123+ 83 Linux <– Arch /home
/dev/sda7 307307448 311403959 2048256 82 Linux swap / Solaris
/dev/sda8 311420088 488392064 88485988+ 83 Linux <– Archives
My /dev/sdb partitions look like this:
/dev/sdb1 * 16384 51216383 25600000 7 HPFS/NTFS/exFAT <– MS Windows XP
/dev/sdb2 51232768 102432767 25600000 7 HPFS/NTFS/exFAT <– MS Windows Programs
/dev/sdb3 102453181 488270159 192908489+ 5 Extended
/dev/sdb5 102453183 106550639 2048728+ 82 Linux swap / Solaris
/dev/sdb6 106565823 137289599 15361888+ 83 Linux <– CentOS tester 1 /(root)
/dev/sdb7 137304783 188501039 25598128+ 83 Linux <– CentOS tester 1 /home
/dev/sdb8 188516223 219239999 15361888+ 83 Linux <– Foresight tester 2 /(root)
/dev/sdb9 219255183 270451439 25598128+ 83 Linux <– Foresight tester 2 /home
/dev/sdb10 270466623 301190399 15361888+ 83 Linux <– Debian tester 3 /(root)
/dev/sdb11 301205583 352401839 25598128+ 83 Linux <– Debian tester 3 /home
/dev/sdb12 352417023 383140799 15361888+ 83 Linux <– vacant tester 4 /(root)
/dev/sdb13 383155983 434352239 25598128+ 83 Linux <– vacant tester 5 /home
/dev/sdb14 434367423 488270159 26951368+ 83 Linux <– common storage
You get the above information on your drives using the fdisk -l command as root from the command line.
Alright then, let’s say that I now want to install Fedora Core Linux on my tester 4 partitions of /dev/sdb. Here’s how I would do that step-by-step:
1) Begin the Fedora installation setting /dev/sdb5 as swap, /dev/sb12 as /(root), and /dev/sdb13 as the /home partition from Fedora’s installer.
2) When the Anaconda installer reaches the point where it asks where I want to install the GRUB bootloader, I choose to SKIP installation of GRUB.
3) Once the install is finished, I reboot my main operating system (Slackware) and from the command line I mount the newly installed Fedora /(root) partition:
root_Slackware/home/vtel57:# mount /dev/sdb12 /mnt/tmp
*Note: I have a /mnt/tmp directory in my Slackware. If you don’t have a /mnt/tmp, just mount in /mnt. You’ll be fine.
4) I list the contents of the Fedora /boot directory:
root_Slackware/home/vtel57:# ls /mnt/tmp/boot
5) I copy down the vmlinuz and initrd information. You’ll be looking for the vmlinuz-<kernel version> and the initrd-<kernel version>.img files specifically. You’ll need that information for the next step.
6) I edit my /boot/grub/menu.lst file to add the new Fedora Core entry. Note: my MBR-controlling GRUB is in my secondary OS, Arch Linux. I can still mount and modify it from within Slackware, though.
root_Slackware/home/vtel57:# mount /dev/sda5 /mnt/tmp
root_Slackware/home/vtel57:# vim /mnt/tmp/boot/grub/menu.lst
I’ll add this entry to the file:
# Fedora Core
title fedora (t4)
root (hd1,11)
kernel /boot/vmlinuz-<kernel version> root=/dev/sdb12 ro
initrd /boot/vmlinuz-<kernel version>.img
7) I reboot and choose “fedora (t4)” from the GRUB menu to boot my new Fedora installation.
That’s it, folks. Straightforward, but not necessary the easiest way to do this. That’s the beauty of GNU/Linux. You can do it your way.
Have fun!
~Eric
P.S. I’m still working on the next shell scripting lesson. It’s going to be about variables and parameters, a necessary lesson for further BASH learning. Unfortunately, it’s also kinda’ complicated, so it’s taking me a bit to figure out how to formulate a lesson and still stay loyal to my primary goal here… keeping it as simple as possible. Stay tuned…
A (Very) Brief Introduction to VIM
Posted: 5 April 2011 Filed under: Linux | Tags: command line, editors, Linux, nano, vi. emacs, vim 9 CommentsPreviously here, while discussing the Linux shell, we briefly touched upon the need to have a command line editor that you’re comfortable using.
While there are quite a few very good editors out there (EMACS, Nano, etc.), vi/vim are my favorites. Some would say that I’m into self-flagellation to like vi/vim, but I think it’s probably due to the fact that they were my first exposure to command line editors. I’ve only recently found and used Nano (in Arch Linux). It’s pretty cool, but vim is my baby when it comes to editing on the command line.
Billions of electrons have been spent discussing the merits of one editor over another. We’re not going there today, though. I’ve become kinder to electrons in my old age. Instead, I’m going to show you the very basics you need to create or edit an existing text file from the command line using vim (vi – improved). If you learn just these few simple keystrokes, you should be able to edit a file should you ever need to.
OK, let’s start with how to start vim in the command line. Well, that’s pretty simple. Here are a couple ways. You can just type the executable for vim into your command line:
joe@mysystem:~$ vim
If you do it this way, the command will tell vim that a not-too-experienced user just called up the application and it will come up assuming you need some help:

That is the vim intro page. Now, a bit more experienced user will never see that page because he/she knows how to start vim in another way. Let’s say that we want to create a text file called testing and open it in vim ready-to-edit. This is how user Joe would do that:
joe@mysystem:~$ vim testing
In this example, a wiser Joe knows that this command will open the vim editor application with file testing just sitting there waiting to be edited, or created, in this case.
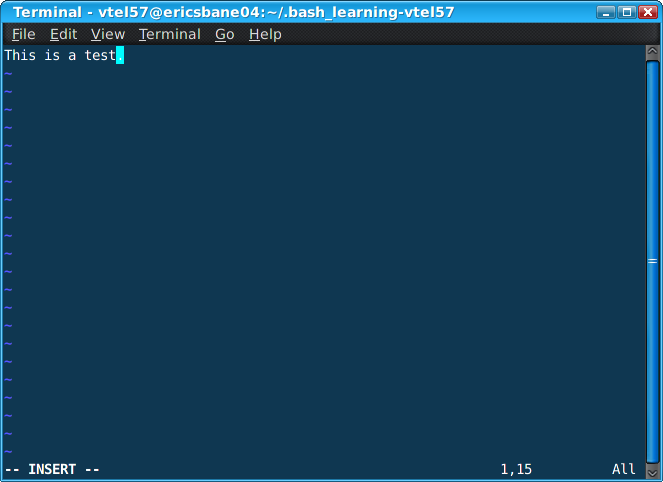
You can see that Joe has typed in a bit of text already. He must have done that when I got up to get my coffee refilled. Sneaky guy, ain’t he? Anyway, You’ll also notice at the bottom left of the editor window is the word INSERT. What this means is that vim is in one of its Input modes. The other mode is the Command mode, but we’ll get to that in just a sec.
To get into the Input mode, you would press the key i on your keyboard. This would put vim into the Insert mode right where the cursor is. If you hit the a key instead to get into the Input mode, vim will advance the cursor one spot and then enter Input mode. You can also get into the Input mode on most keyboards by using the Insert key, which is usually located just above the Delete key in that block of six keys just above your navigation (arrow) keys.
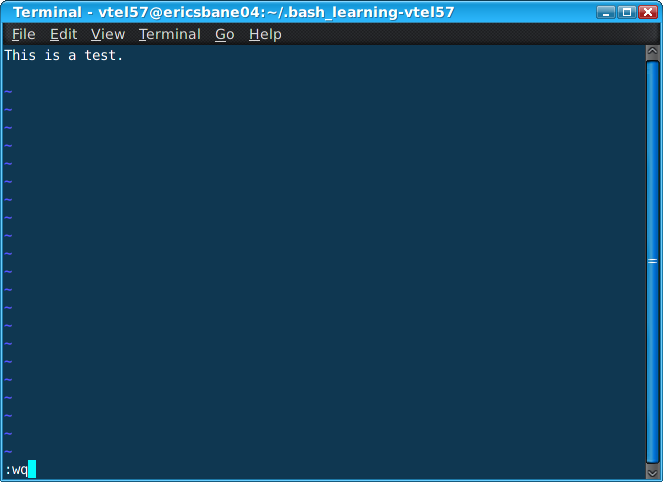
Oh, and speaking of those arrow keys… those are used to navigate within the file while using vim. You can also use the h, j, k, and l keys to move left, down, up, right, respectively. When you’re done moving and typing, you can leave the Input mode and enter the Command mode by using the ESC key in the upper left of your keyboard. Once in Command mode, you can do another very important chore that everyone needs to know how to do when editing text files… save your work. To save the testing file, just type this while in Command mode:
:wq
This command tells vim to write the file (save it) and quit vim. Here’s what that looks like:
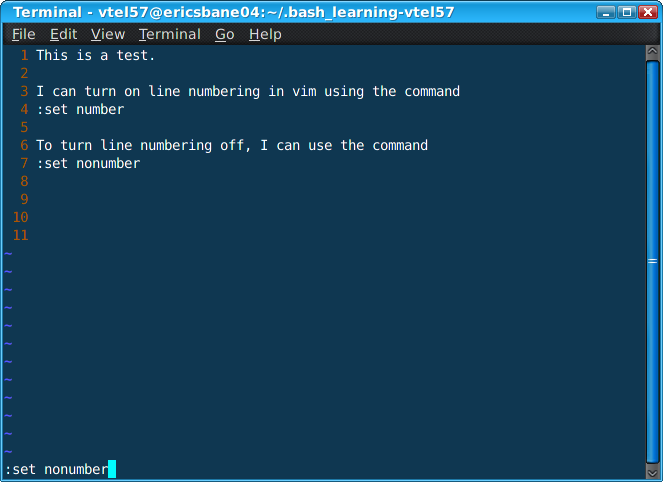
Here’s another neat trick, too. Some folks like to see the line numbers displayed while editing a file. Actually, often it’s a necessity when editing code files. To display the line numbers in vim just enter this command while in the Command mode:
:set number
To turn the numbering off use:
:set nonumber
Here’s a look at that in the vim editor:
You see? There’s nothing really to be afraid of while using vim. It’s nowhere as near as scary as folks would have you believe, huh? When you get a little practice with it and start learning some more of its tricks and shortcuts, it’s really a cool little editor. Oh, and don’t forget to type:
:help
while in Command mode. It will bring up all kinds of useful vim info. For further reading, check out vim’s website and the man page. Of course, you can access the man page from your own computer using the command line:
joe@mysystem:~$ man vim
I hope this lesson on the vim editor has been helpful to you. Don’t let it scare you. Just open up your terminal in Ubuntu or Mint or whatever your favorite GNU/LINUX distro is and create and play around with a practice file using vim. It’s a great way to learn without risking breaking something.
Stay tuned… next up we’re going to learn a little bit about archiving, compressing, and decompressing files using tar, gzip, and bzip2. Should be fun.
Until then…
~Eric
An Introduction to the Linux Shell
Posted: 5 April 2011 Filed under: Linux | Tags: BASH, command line, GUIs, Linux, Linux shell, ls, terminal, vim 7 CommentsShe sells seashells by the seashore. Well, yes… that may be true, but that’s not the type of shell we’re going to talk about here today.
I’m going to talk a bit about the Linux shell. What is the Linux shell? What does it do? How can I interact with it on my GNU/Linux operating system? Those are all good questions. While today’s most popular distributions of GNU/Linux are morphing into operating systems that are more and more graphic user interface oriented, the real power of Linux still resides in the command line.
When you boot up your Ubuntu or Mandriva GNU/Linux operating systems, most of you see a graphical login screen. Others, like myself, might see a non-graphic command line login. Both do basically the same thing. They log the user into the Linux shell so that he may begin to utilize his system’s potential to perform tasks. That’s what we do with our computers, regardless of what the tasks happen to be… emailing pics to auntie Myrtle or hacking cloud and cluster security systems.
The Linux shell is the interface between you in that seat in front of your monitor and the operating system that controls the hardware in that box under the desk that does the actual stuff you want done. There are numerous shells in Linux; the most commonly used one is called BASH – Bourne Again Shell. You’re in the shell anytime you’re logged into your GNU/Linux operating system; whether you’re interacting with it graphically or from the command line.
Graphic User Interfaces or GUIs are just “front ends” to applications that are running in the shell. I’ll be talking mostly about the non-graphical command line interface here today, though. You can access your command line interface from within your GUI by using the graphic front end application for the command line provided by your desktop environment. For example, in Gnome, you could use Gnome Terminal; or in KDE, you could use Konsole. Either way, these are both just graphical front ends for the BASH shell command line.
When you first login, you’ll get what’s known as a prompt. It is just a blank line waiting for your input (commands). It’ll look something like this:
joe@mysystem:~$
The first part, “joe”, is just the user’s login name. “@mysystem” is the name of the computer the user is logged into. The “~” character tells us that user Joe is working from his home directory. The “$” character is the standard character denoting a non-root, regular user.
Let’s say Joe wants to list all the files in his home directory. All he has to do is type:
joe@mysystem:~$ ls
This command, known as “list”, tells the shell that user Joe wants to see a list of all the contents of his home directory. The shell immediately responds after Joe hits the Return (Enter) key on his keyboard with this output:
Desktop joe_archives joe_common joe_private
Dropbox joe_backups joe_downloads
It looks like Joe has five regular directories, a Dropbox directory, and the directory that contains his desktop icons. In reality, there are more directories and files in Joe’s home directory, but they’re what are known as “hidden” files. Their names are usually preceded by a .(period) to make them hidden. If joe wants to see all his directories and files he can list them this way:
joe@mysystem:~$ ls -a
The “-a” option means all. The list command will list all items in a directory when using the -a option. Joe’s list now looks something like this:
.dropbox .macromedia .thunderbird
.ICEauthority .esd_auth .moz_icons .viminfo
.PySolFC .fontconfig .mozilla .wicd
.Xauthority .gconf .mozilla_3.x .xchat2
The above directories are hidden by the preceding .(period), as mentioned above.
Let’s say Joe want’s to create a grocery list for his afternoon shopping chores. He can do this via the shell and command line also by using a command line editor such as vim. He would first do this by bring up the vim application in the command line interface:
joe@mysystem:~$ vim groceries
This command would initiate the vim application using a new file called “groceries”. Vim or Vi-Improved, as it’s known, is a non-graphical text editing application. It would look something like this to Joe:
lettuce
tomatoes
catfood
peanut butter
eggs
milk
bread
~
~
~
–INSERT– 10,1 All
Once Joe had finished typing out his grocery list, he would save it using the vim command :wq, which would also close the vim application and bring Joe back to the command line prompt. He could also print his list from the command line like this:
joe@mysystem:~$ lpr groceries
The lpr command would tell the shell that Joe wants to output the contents of the groceries file to the printer. The printer would receive the data and the command to print from the computer’s hardware and begin printing Joe’s grocery list.
All of this we’ve talked about today doesn’t even scratch the surface of the power at your finger tips when using the Linux shell. Your first step should be to read the Linux manual page for the BASH shell. There is some very useful information in that document. Stay tuned here… I’ll come up with some other lessons in the future. Remember what I always say…

Learn something. It won’t hurt you none. I promise.
Later…
~Eric
*This was previously posted on my old Nocturnal Slacker (@LockerGnome) blog and on the Community Blogs at Linux.com. I’m reposting it here to keep the series all in one place.